It’s not particularly easy getting DVD content onto an iPad, though there are several ways of doing so. And this is something most iPad users will want to do since the Apple tablet is a sweet (if not HD) device for viewing video.
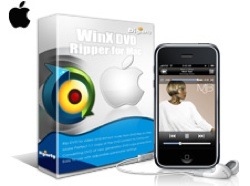
Digiarty Software has updated its US$39.95 DVD Ripper for Mac (http://www.winxdvd.com/dvd-ripper-for-mac/) with Power PC support added, so it’s an option worth considering. It now works with both PowerPC and Intel Macs. The app — formerly a Windows-only utility — lets you convert your DVD movie collections for playing on a Mac, iPhone, iPad, iPod, PSP, etc.
DVD Ripper for Mac works on both encrypted and non-commercial homemade DVDs and can convert to MP4, MOV, iTunes, iLife, AVI, FLV, MP3, etc. that playable on Mac, but also converting DVD content to the format playback on the portable devices mentioned above.
It’s also a solid solution for those who want to make backup DVD copies of their protected DVDs. DVD Ripper can make a 1:1 DVD copy to hard drive by removing the copy-protection from encrypted discs. Plus, it has an editing function that lets you trim any video segment you favor and adjust the video effects, like video resolution, frame rate, bitrate and audio channel depending on what you like.
Using it is relatively simple. Launch the program and import the DVD. You can load from DVD driver by clicking “Disc” or from DVD Video_TS folder by clicking “Path.” Choose the output format you want to work with (DVD to iPad, DVD to iPod, DVD to iPhone, DVD to MP4, etc.).
You can define video and audio parameters to customize video quality, like resolution, and frame rate, etc., though the default settings work well enough. After you’re done customizing, you can save the results as your preferred Profile for future use. Click “Option” button — > Click “Profile” table — > Set your own profile — > Click “Add”. Then the Profile will be added and shown in the “Profile” drop-down menu.
After you’re done customizing (if you do), click “Browse” button in output setting area and select a destination folder to save your converted video. I created a folder called “iPad movies.”
Then you can start ripping. You can view the conversion progress and are able to cancel the converting process at anytime.
If you want to copy a DVD with original video, audio and subtitles, select “Copy.” Choose the destination folder and click “Start.” Then you can copy your DVD to your Mac .
One caveat: his WinX DVD Ripper Platinum error might happen if you are ripping DVDs of the latest copy protections such as “Alice in Wonderland” (which I did). If this happens (thought it didn’t to me), follow these steps:
° Make sure the version of WinX DVD Ripper Platinum is higher than version 5.2.
° Use your DVD Player (either DVD player software or stand-alone DVD player) to play the DVD. When it comes to the movie (main content), check the DVD title and record this title number.
° Then run WinX DVD Ripper Platinum and choose “Run as safe Mode” option in the Advanced Setting area of main interface. Choose the same title number as you recorded in the File List Windows.
Finally (this is important — and not mentioned in the DVD Ripper instructions), go to iTunes and choose “Add to Library” to import the video. Otherwise, it won’t sync with your iPad.
Also you can rename the video in the iTunes after conversion. Right click the converted video in iTunes, choose “Get info” ->”Info”, and input the video information (Name, Artist, etc.).
In summary, if you want to “rip” DVDs to different devices, then WinX DVD Ripper is a solid choice. On the other hand, you might check out the US$19.95 RipIt from Little App Factory (http://thelittleappfactory.com/). It’s a bareboned app that lets you rip DVDs to your hard drive. It also has a compression option you can use to make iPad-compatible versions of your flicks.
RipIt isn’t as flexible as WinX DVD Ripper. But it is faster and cheaper.
Rating for WinX DVD Ripper: 7 out of 10


